
A friend of mine wanted to put some embroidery on the back pocket of her granddaughter’s jeans. However, there is no way she could do that in a hoop unless she removed the pocket for embroidering and then sewed the pocket back on when finished. Who wants to do that? So I suggested she create an iron-on patch for the pocket, and that gave me the idea for my next blog!
I’m happy to say that making patches is really easy. With simple materials, you can create a iron-on patch with your embroidery machine. In this blog, I’ll show you a couple of methods that will give you a patch with a clean edge that can be ironed on a project.
The Patch Design
The Base Fabric
Create your iron-on patch on a fabric that is smooth in texture and does not stretch or distort when embroidered. Felt, wool, twill, and denim are all good choices. Take care when using a fabric that ravels especially if you are leaving any fabric to show around the embroidered design.
The Patch Edges
There are several options for creating your patch. Create a badge of some shape around the design you want on the patch. The shape can be a circle, rectangle, oval, or any number of closed shapes that you desire. Another option is for the satin-stitched edge to outline the design along the design’s edge. You can also create a patch with the satin-stitched border offset from the design by some distance that you choose. You could also just leave a bit of the base fabric around your embroidered design. Finally, you can create a patch that has no border at all.


Satin Stitch Edge
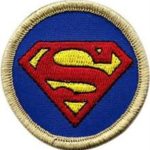
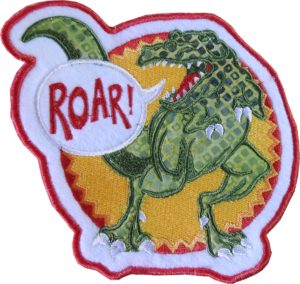
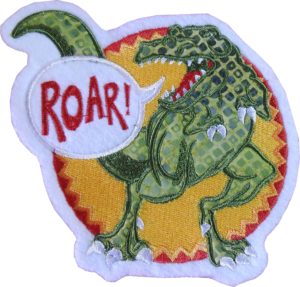
The Superman patch has satin-stitched border around the circle. The fox patch above has white satin stitching all around, and right next to, the embroidery design. The roaring dinosaur has a satin edge but it is offset from the design by a specified distance. For these types of designs, use tear away stabilizer in your hoop to hold the satin stitches, but provide a clean edge when the stabilizer is removed.
Fabric Edge
The bulldog has a bit of the base fabric along the outside edge of the design. This bit of fabric that shows can be wider if desired. If you make this sort of patch, your base fabric needs to be something that doesn’t ravel.
The same is true for the other dinosaur which has stitches in the design right up to the edge of the patch. For both of these patches, use water soluble stabilizer in your hoop. Once you wash away the stabilizer, you’ll have a nice clean edge on your patch provided by the base fabric.
Let’s Make a Patch
Anita Goodesign released a Kid’s Patches design set a while back, and I decided to use a couple of them for this blog.
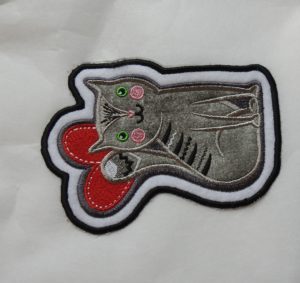
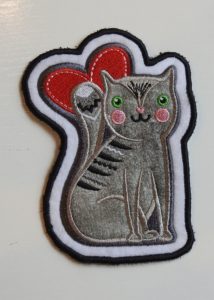
Here, Kitty, Kitty!
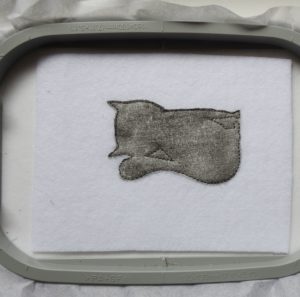
My granddaugther loves cats, so I decided to make a patch from the cat design in the collection. My first thought was to create some satin stitches that were offset from the design. I wanted the satin stitches to follow the contour of the design.
Create Applique
With the Brother PR1000, as well as with other high end embroidery machines, you can create offset satin stitches right in the embroidery machine. Check your instruction manual to see if/how you can do that. In addition, you can use the outline function in software such as Floriani’s FTCu to create a satin stitch some distance from the design.
- For the PR1000 (and the Brother Dream Machine is quite similar), first load your design.
- Next, select the applique function.
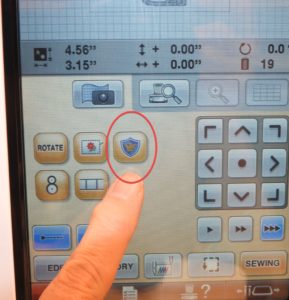
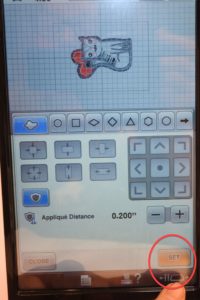
- From the different applique shapes, select the one that will follow the contour of your design. Of course, if you’d rather just create a geometric shape and place the cat in the middle, you can select any of the other applique designs.
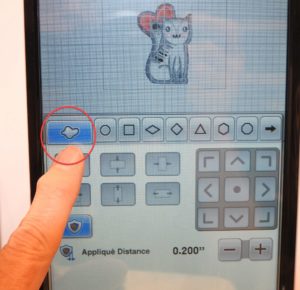
- Choose how far from the design you want the satin stitched border. I selected 0.200″.
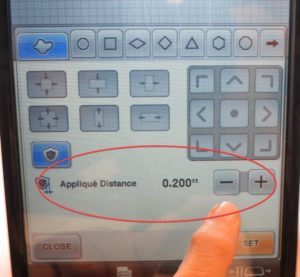
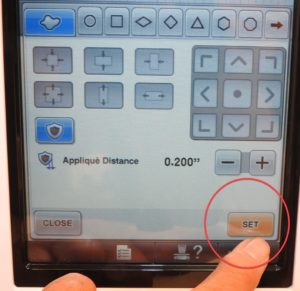
- Click on Set.
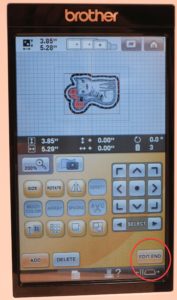
- It is possible that, once you have added the applique outline that the design might be too big. If so, you’ll get a message:
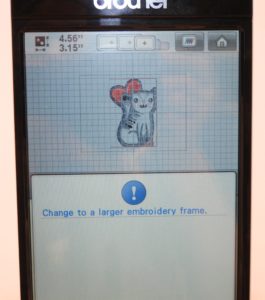
- In this case, rotate the design to make it fit in the 5″ x 7″ frame. Go to edit and select Rotate.
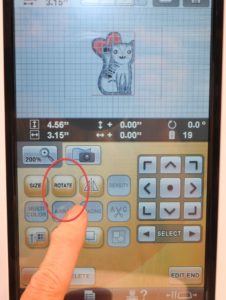
- Rotate design 90°. (It doesn’t matter if it’s rotated to the left or to the right).
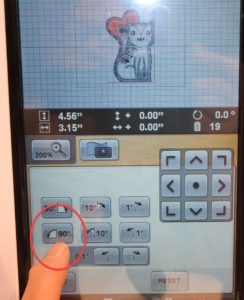
- Once rotated, click on Set.
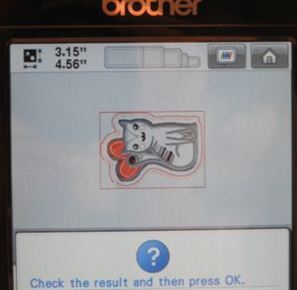
- Check the results of the outline with the satin stitches and press OK.
- Note that the machine has created a three step applique, first stitch for placement, then for tackdown and finally to sew out the satin stitches.
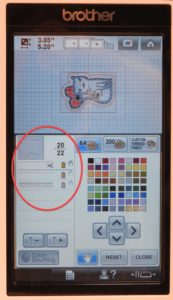
- I changed the color of the outline to black.
Now we’re ready to sew out the patch.
Embroider The Design
- Hoop a piece of tear away stabilizer. Use a tear away that has sufficient weight for your design but also provides a clean tear away such as OESD’s Ultra Clean and Tear or Floriani’s Medium Tear Away.
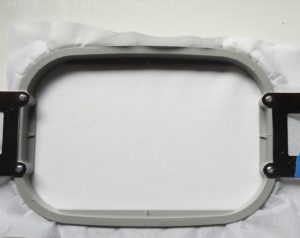
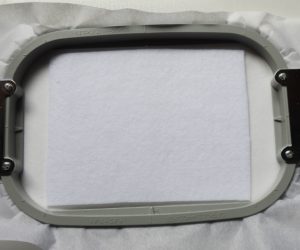
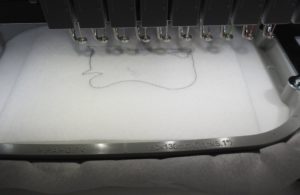
- Place a piece of your patch base fabric (I used white felt) on top of the stabilizer, making sure it is big enough to hold the entire design.
- Stitch out the placement stitch for the cat applique.
- Place your applique fabric over the placement stitch and sew out the tack down stitch.
- Trim away the excess fabric cutting close to the tack down stitches.
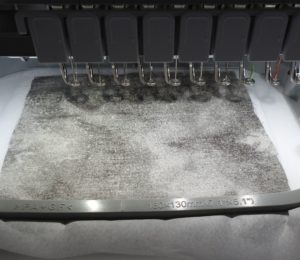
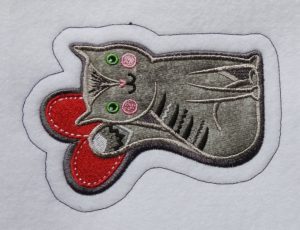
- Sew out the rest of the cat design.

- Once the cat is finished, sew out the tack down stitch for the white felt.
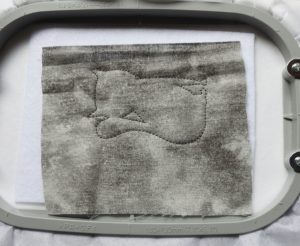
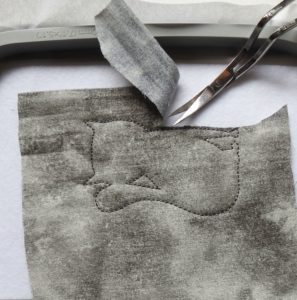
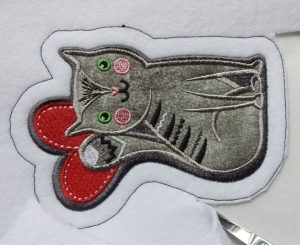
Note: if you just wanted the felt to show around the cat without a satin stitch, you could stop sewing here and simply cut out the patch just inside the tack down stitches. (See the dinosaur below.) - Trim the excess felt away, cutting close to the tack down stitch.
- Sew the offset satin stitches outlining the embroidery.
- Remove the stabilizer.
Note: If you want to sew the placement, tack down and satin stitches for the patch outline first, you can just find them in the sequence and sew them first. When I added those applique stitches on the PR1000, they were added last in the sewing sequence. - Remove the completed design from the hoop and tear away the excess stabilizer.
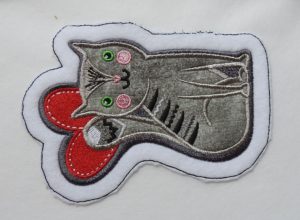
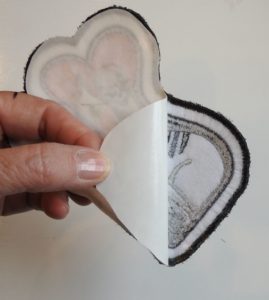
Apply the Iron-On Patch Adhesive
I use OESD’s Fuse and Seal for the patch adhesive. Fuse and Seal comes in 8″ x 10″ sheets or on a 15″ x 5 yd roll.
- Place the patch face down on the wax paper side of the Fuse and Seal.
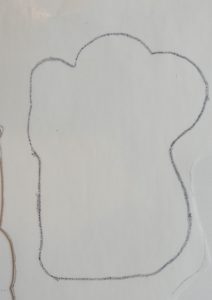
- Draw a line around the patch with a pen or Sharpie.
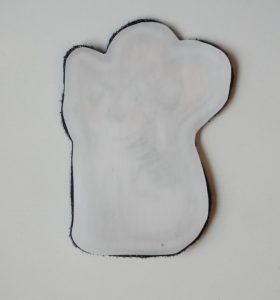
- Cut out the shape, cutting inside the lines to make the adhesive a little smaller than the patch.
- Align the patch and the cut out adhesive, making sure the adhesive side is facing the back of the patch. Make sure none of the adhesive extends outside of the patch.
- Heat fuse the adhesive to the patch. I have a heat press and used 350° for 45 seconds. If using an iron, follow the manufacturer’s instructions and use a pressing cloth on the embroidery side of the patch.
- Peel the paper backing off of the patch when ready to apply to your project.
- Apply to your project per manufacturer’s directions.
(I haven’t attached my patch to anything yet. Will give it to my Granddaughter to see what she wants to put it on.)
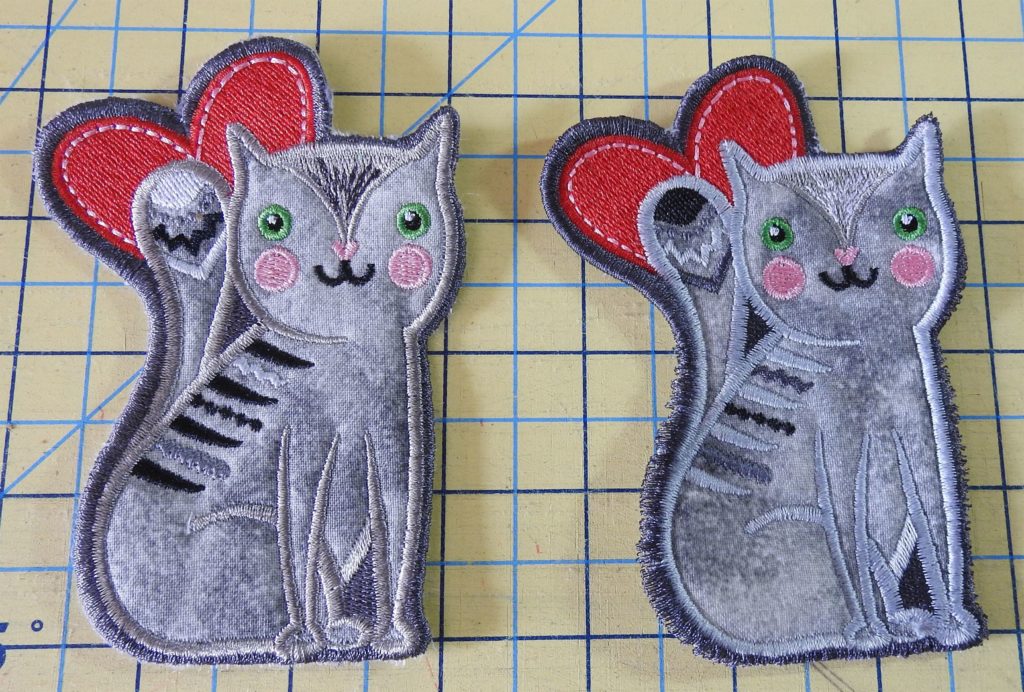
Why Not Wash Away Stabilizer?
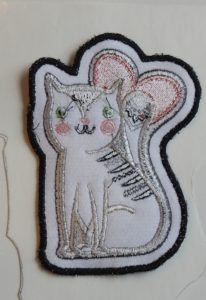
My cat patch had a few fibers from the tear away left behind after removing the stabilizer. So I decided to try wash away stabilizer to eliminate the need to tear away the stabilizer at the end. That did not work out so well.
In this example, I made the cat patch without the offset border, and just used the satin stitches around the cat as the patch edge. In the photo below, the cat on the left was made with tear away stabilizer and the cat on the right with wash away stabilizer. Note how the satin stitches in the cat on the right are loops. I cut away the base fabric too close to the placement line for the cat. Thus, when the stabilizer was washed away, there wasn’t any base fabric for the satin stitches to “grab onto”. When I washed away the stabilizer, there’s nothing under the stitches, leaving loops of stitches as a result.
So you need to either leave a greater edge when trimming the base fabric or use tear away stabilizer for these types of patches. It’s hard to know how much fabric you need to leave outside the placement stitch as you don’t want any fabric hanging out from the satin stitches. So, I think it’s just easier to use tear away stabilizer.
Roar!
My grandson loves dinosaurs, so I decided to try this one next. However, this design did not have satin stitches around the edges of the dinosaur, so I left a little of the felt showing around the edge of the design. Since this design has the felt all the way out, creating the edge of the patch, I could use water soluble stabilizer. I really like OESD’s AquaMesh stabilizer. I find this water-soluble stabilizer is great because it provides a good substrate for the stitches but washes away cleanly.
For this design, or for any patch that will have a base fabric all the way to the edge of the embroidered iron-on patch, follow the same instructions as above for creating the patch with the exception of adding the offset satin stitches. Of course, you can narrow the amount of base fabric around the design by changing the offset distance.
Patch It!
Iron-on patches are fun and easy to make. Any design can be made into a patch by simply adding the design to a geometric applique design with a satin stitch border, or by leaving some of the base fabric outside the embroidery if using wash away stabilizer. The possibilities are only limited by your design collections and your imagination. I see some peace sign patches in your future!

Stop by your local Rocky Mountain Sewing and Vacuum to take advantage of the coupon below and pick up some stabilizer or Fuse and Seal at 30% off.

Comments
Kimberly
I woud love to ito make my own
Cathy Ellsaesser
Thanks for the feedback and for reading our blog. Happy Sewing!
Sara
Really appreciate it, was searching for this to no avail. Thumbs up ❤️
Cathy Ellsaesser
So glad it was helpful. Thanks for reading our blog and happy sewing!
Shannon
Thanks so much. Just what I needed to make a patch for a hat
Cathy Ellsaesser
The heart is not a separate applique, but rather just part of the embroidery design. It’s just fill stitches. It is from the Anita Goodesign collection called
Kids’ Patches.
Thanks for reading our blog! Happy sewing!
Paula Travers
How did you put the heart on the applique and what kind of red fabric is that? Great project. My daughter loves cats. She wants a pink beanie with a cat decal.
Cathy Ellsaesser
I have updated the blog with a link to the product on our webpage. Check with any of our stores to see if they have it in stock and, if not, ask them to order it for you. Thanks for reading our blog!
OESD Fuse and Seal
Gretchen
Hi! Thanks for the tutorial. I tried the link you provided for the fuse & seal, and it doesn’t appear to work anymore. I googled the product and ended up buying this on Amazon (https://smile.amazon.com/gp/product/B01LLVWEEQ/ref=ppx_yo_dt_b_asin_title_o03_s00?ie=UTF8&psc=1) but it did NOT work as described in this tutorial. I’m guessing I bought the wrong thing. What should I buy instead? Thanks so much for any assistance. 🙂
Cathy Ellsaesser
You know what they say, the only silly questions are the ones not asked!
I have never had a problem with placing fabric right on top of hooped stabilizer. I rarely hoop my fabric! I might gently keep my fingers on the fabric until a few stitches are made to hold it in place, and I occasionally will use tape if I’m really concerned that the fabric (or felt in this case) will shift, but really I’ve never had it shift on me.
Now, when I am making something like a lined bag that has you place fabric on the underside of the hoop, of course I tape that!
Hope this helps! Thanks for reading our blog and happy sewing!