Putting on the Glitz
Share
Combine OESD Glitz designs+Brother ScanNCut+rhinestones+t-shirt and get ready to sparkle! I love rhinestone-studded "just about anything." Even more, I really love using the ScanNCut to make the process of adding rhinestones to a project so easy.
I've published a couple of blogs in the past on using the ScanNCut to create the templates for adding rhinestones to a project, The Brother Rhinestone Kit Part 1: CanvasWorkspace and Put a Little Bling on Your Embroidery. The Brother Rhinestone Kit, Part 2. With this blog, let's walk step-by-step from aquiring a Glitz design from OESD to the final step of adding it to a t-shirt.
Glitz Designs from OESD
I've written before about how much I love OESD designs, and that still holds true today! I especially love the glitz design collections that are made to sparkle by adding rhinestones.
For this blog, I picked a design from Glitz Garden to put on a t-shirt.

Creating Template for Rhinestones in Canvas Workspace
Get a .jpg or .bmp of Design
In order to set up the proper placement of the rhinestones in relation to the design you are using, you must have a .jpg or .bmp picture of the design that is the exact same size as the design itself. Accordingly, the best way to do this is to capture a .jpg file from your embroidery editing software.
In Floriani Total Control, load your desired design, and then select file/save as and select .jpg as the format. For this purpose, I toggled the drawing stitches to 3D before exporting the file.
In Embellish Maker, load the design, toggle to 3D look if desired, and then choose File/Export Image.
I don't have other software programs to check, but I feel fairly confident that software from PFAFF, Bernina and Brother also allow you to save a .jpg file from a loaded design.

Canvas Workspace
Load Picture into Canvas Workspace
Most important, you need Canvas Workspace, the free Brother application for using your ScanNCut, to create the template for the rhinestone placement. Check out my previous blog for instructions on using Canvas Workspace.
Once you have the right-sized picture of the design, load it into Canvas Workspace.
Click on the Image Tracing icon.

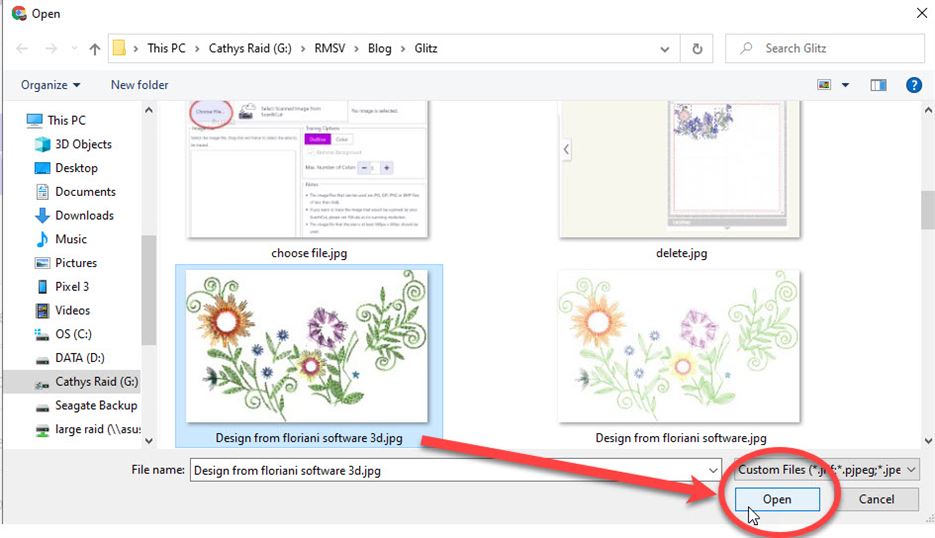
Click on Choose File.

Browse for the .jpg you created from your embroidery editing software, and select Open.

Create, Then Delete Cut Data
Canvas Workspace thinks that you want to create a cut file from this design, but, actually, all we're doing is using the design in the background to decide where to put rhinestones. However, I couldn't see a way to just load the background picture without tracing first. So, allow the software to create the cut data, but then delete it, leaving the background in place.
Trace Design
Select a tracing option. Frankly, it doesn't really matter which option you choose as the resulting cut data is going to be deleted. Just be sure that the Remove Background box is NOT CHECKED.
Click OK to begin the trace.

When prompted, confirm with Yes that you want to paste the selected image on the work area.

Remove Cut Data
Once the trace is complete, delete the cut data that was generated.
Click on the Edit button.

Select All.

This selects all cut data.

Click on the Trash Can.

All cut data is removed and the background picture is left in place.

Place Rhinestones as Desired
Now the fun begins! Let's glitz it up!
Note: You must activate the premium rhinestone feature before you can use the rhinestone functions in Canvas Workspace.
Note: the exported .jpg will be stitches only. It is up to you to decide where to place the rhinestones on the design.
Zoom in on the design so you can better see where to place the rhinestones.
Click on the Premium tab and select the single Rhinestone icon.

Now click on the design where you want the rhinestone to be placed. This is a one-at-a-time placement. Initally, the size of the placed rhinestone is whaever you used last. Once you have all of the same-sized rhinestones placed, select them all, and then right click to adjust their size.
Then, add a rhinestone for the next size. Right click on that rhinestone and change the size as desired. Now the subsequent rhinestones you place will be of the size you just selected.
Edit Placement/Size/Color
Once you have the rhinestones placed, select the edit function to quit placing rhinestones. Now you can select individual circles or multiple ones and adjust the placement and size as desired. To move a placement circle, simply select the cirle by clicking on it (left click). Then, while holding the left mouse button down, drag it to the desired location.

You can also change the colors of the circles if desired.
Select the circle(s) you want to color, then right click on them and select properties. Click on the down arrow by the pen color icon.

Select the desired color from the color chart.

Note: Adding color to the circles does not affect the subsequent cutting of the circles. If desired, use it as an aid in designing the rhinestone color scheme.

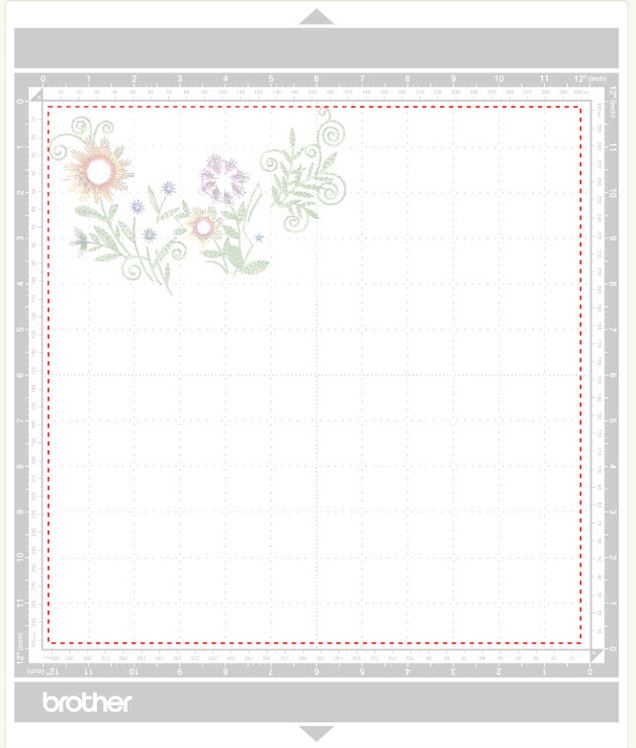
Keep all rhinestone placement circles inside the red dashed line on the simulated mat.
Save .fcm File
Once you are happy with the rhinestone placement, save the file. Send it to either a USB stick or your PC. In addition, you can send it directly to the cloud for automatic download to your ScanNCut if your machine has that feature.
Click on the Download icon.

Select which save method to use.

If saving to PC or USB, give the design a file name. Select Download to PC. Then, navigate to where you want to save the file.
If saving to the cloud, select ScanNCut Transfer.

Receive confirmation.

Stitch out the Garden Glitz Embroidery Design
Load the glitz embroidery design into your embroidery machine. Then stitch out the design.

I love the Snowman for centering a design! 
I put mine on a grey t-shirt. Be sure to stabilize any knit with a cut-away stabilizer.

Create Rhinestone Template
In a previous blog there are detailed directions for creating a rhinestone template.
Load the created template into your ScanNCut. I retrieved mine from the cloud.

Opening Screen 
Retrieve from Cloud 
Retrieving

Touch the Please Select button and then Cut from the subsequent screen. Select OK.
On the next screen select the wrench to modify cutting parameters if necessary.

View page two of the settings by touching the double down arrow. Then, select half cut. Adjust half cut pressure if necessary. Touch OK when finished.
Note: Automatic cutting settings and half cut settings are only available on the ScanNCut SDX225 and SDX230.
Adhere the template material onto the mat. Load mat into the ScanNCut.
Touch Start to begin the cutting process.

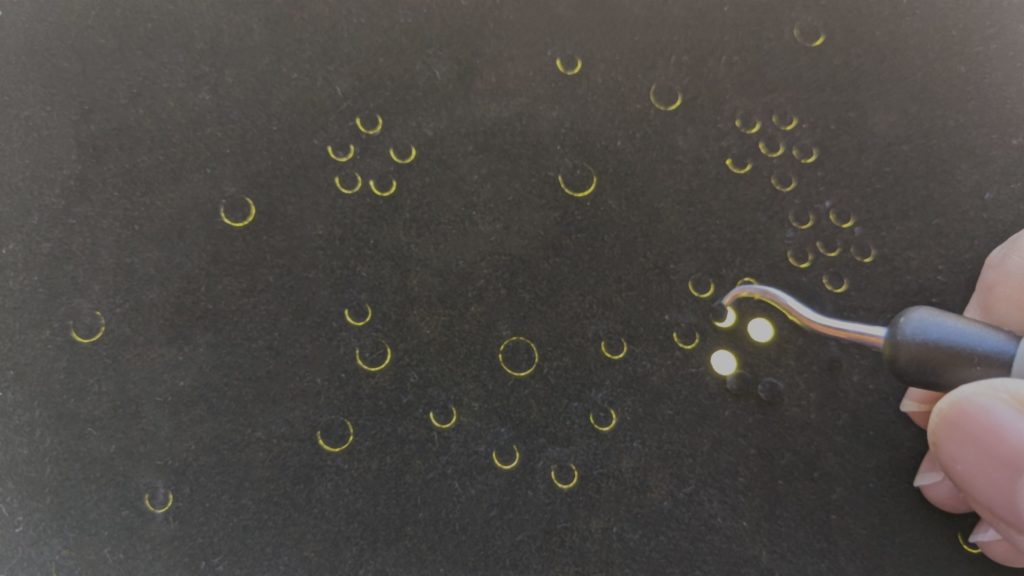
Remove the centers of the circles from the template material. A light box really helps you see where the circles are cut.


Place rhinestones as desired on the template.

Cover Rhinestones with tranfer tape to pick them all up in the correct placement.
Bring on the Glitz!
Once you have the rhinestone template on the transfer tape, align the rhinestones with the embroidery. The transfer tape is slightly sticky, so it should stick to the project well enough until you iron the rhinestones in place.

I love my 36" Singer Professional Steam Press, and it is perfect for the job of heat tranfer. Fix the rhinestones to the t-shirt with just one press! I used a cotton setting on the press. Be sure to use a teflon sheet over the transfer tape.
Let the shirt cool before removing the transfer tape. Check to make sure all rhinestones have adhered to the t-shirt. Press again if necessary.
Glitz!
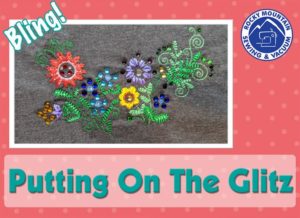
With the help of OESD's Glitz designs, the Brother ScanNCut with the Rhinestone premium add on, I've turned a plain grey t-shirt into a beautiful rhinestone-studded Glitz Garden.

Glitz Designs On Sale at OESD
Currently (as of April 7, 2021) OESD has many of the Glitz designs on sale. So check it out. Be sure to go in through our portal as a Rocky Mountain Sewing and Vacuum customer.
Bling on and happy sewing!


